Qase Docs
Help CenterAPI DocsRoadmapSign up for free
  • General
    • Qase docs
    • Get started with the Qase platform
      • Account settings
      • Projects
      • Test suites
      • Test cases
        • Test Case Parameters
        • Test case review
        • Shared steps
        • Import test cases
        • Export test cases
        • Trash bin
        • Muted Tests
        • System fields
        • Nested steps
        • Test case actions
        • Filters
      • Requirements Traceability Report
      • AI Test Case Generator
    • Execute testing
      • Test plan
      • Test runs
      • Configurations
      • Environments
    • Issues tracking
      • Defects
      • Milestones
      • Requirements
    • Analytics
      • Dashboards
      • Queries (QQL, Qase Query Language)
      • Saved queries
    • Webhooks
      • Test Case
      • Test suite
      • Test plan
      • Shared step
      • Milestone
      • Custom field
      • Test run
      • Defect
      • Test review
  • AIDEN
    • AIDEN - QA Architect
  • Guide: Action editor
  • Administration
    • Workspace management
      • Users
      • Invites
      • Groups
      • Roles
      • Fields
      • Custom fields
      • Notifications
      • Tags
      • Attachments
      • Audit logs
      • Hotkeys
    • SSO / SAML instructions
      • AzureAD
      • OneLogin
      • Google Workspace
      • Okta
      • JumpCloud
    • SCIM
      • User lifecycle management with SCIM
      • Enable SCIM
      • Users
      • Discovery features
      • Errors
    • Security
      • SOC 2 Type II / SOC 3
      • ISO/IEC 27001:2022
      • Penetration testing report
      • Subprocessors
      • Qase IP addresses
    • Billing
      • Billing options
    • Subscriptions
      • Free plan
      • Startup plan
      • Business plan
      • Enterprise plan
  • Apps
    • Issue tracking
      • Jira Cloud
      • Jira Server/Datacenter Plugin installation
      • GitHub
      • Asana
      • Linear
      • Monday
      • ClickUp
      • Trello
      • Azure DevOps
      • GitLab
      • YouTrack
      • Redmine
    • CI/CD
      • Jenkins
      • BitBucket
      • GitHub CI
      • GitLab CI
    • Chats
      • Slack
  • Automation
    • Qase API
    • Reporters
      • JavaScript
        • Playwright
        • Cypress
        • Mocha
        • Newman
        • Jest
        • WebDriverIO
        • CucumberJS
        • TestCafe
      • Python
        • Pytest
        • Robot Framework
        • Behave
        • Tavern
      • Java
        • TestNG
        • JUnit 4
        • JUnit 5
        • Cucumber 3 (jvm)
        • Cucumber 4 (jvm)
        • Cucumber 5 (jvm)
        • Cucumber 6 (jvm)
        • Cucumber 7 (jvm)
      • PHP
        • PHPUnit
        • Codeception
      • Kotlin
        • Kaspresso
    • Qase CLI App
      • XCTest
Powered by GitBook
On this page
  • How to configure fields
  • Values
  1. General
  2. Get started with the Qase platform
  3. Test cases

System fields

PreviousMuted TestsNextNested steps

Last updated 4 months ago

How to configure fields

You can access the fields section in multiple ways:

  • Click on “Fields” on the workspace page

  • Click on “Configure fields” when creating or editing a test case.

To turn system fields on or off, follow these steps:

  1. Click the "Configure fields" button

  2. Select the field you want to configure

  3. Click on the “Enable for all projects button”

  4. Configure the field as desired.

Values

You can change the values of system fields if you're on the startup, business, or enterprise plans. These fields include:

  • Conditions: Here you can say what needs to happen before (Pre-conditions) and after (Post-conditions) the test case is performed.

  • Tags: A quick way to label your test cases with values that doesn't require any preliminary configuration.

  • Custom Fields: It's hard to know what unique parameters or properties your test case will require. You can create your own custom fields with different data types to store any extra information about your test cases that isn't covered by the standard options. If you haven't created any custom fields yet, you won't see this section in the test case configuration.

  • Parameters: You can set up your test case to be parametrized and to be performed during a test run in several iterations, depending on how many parameter values you define. You can also add multiple parameters and have multiple values within each parameter that you create.
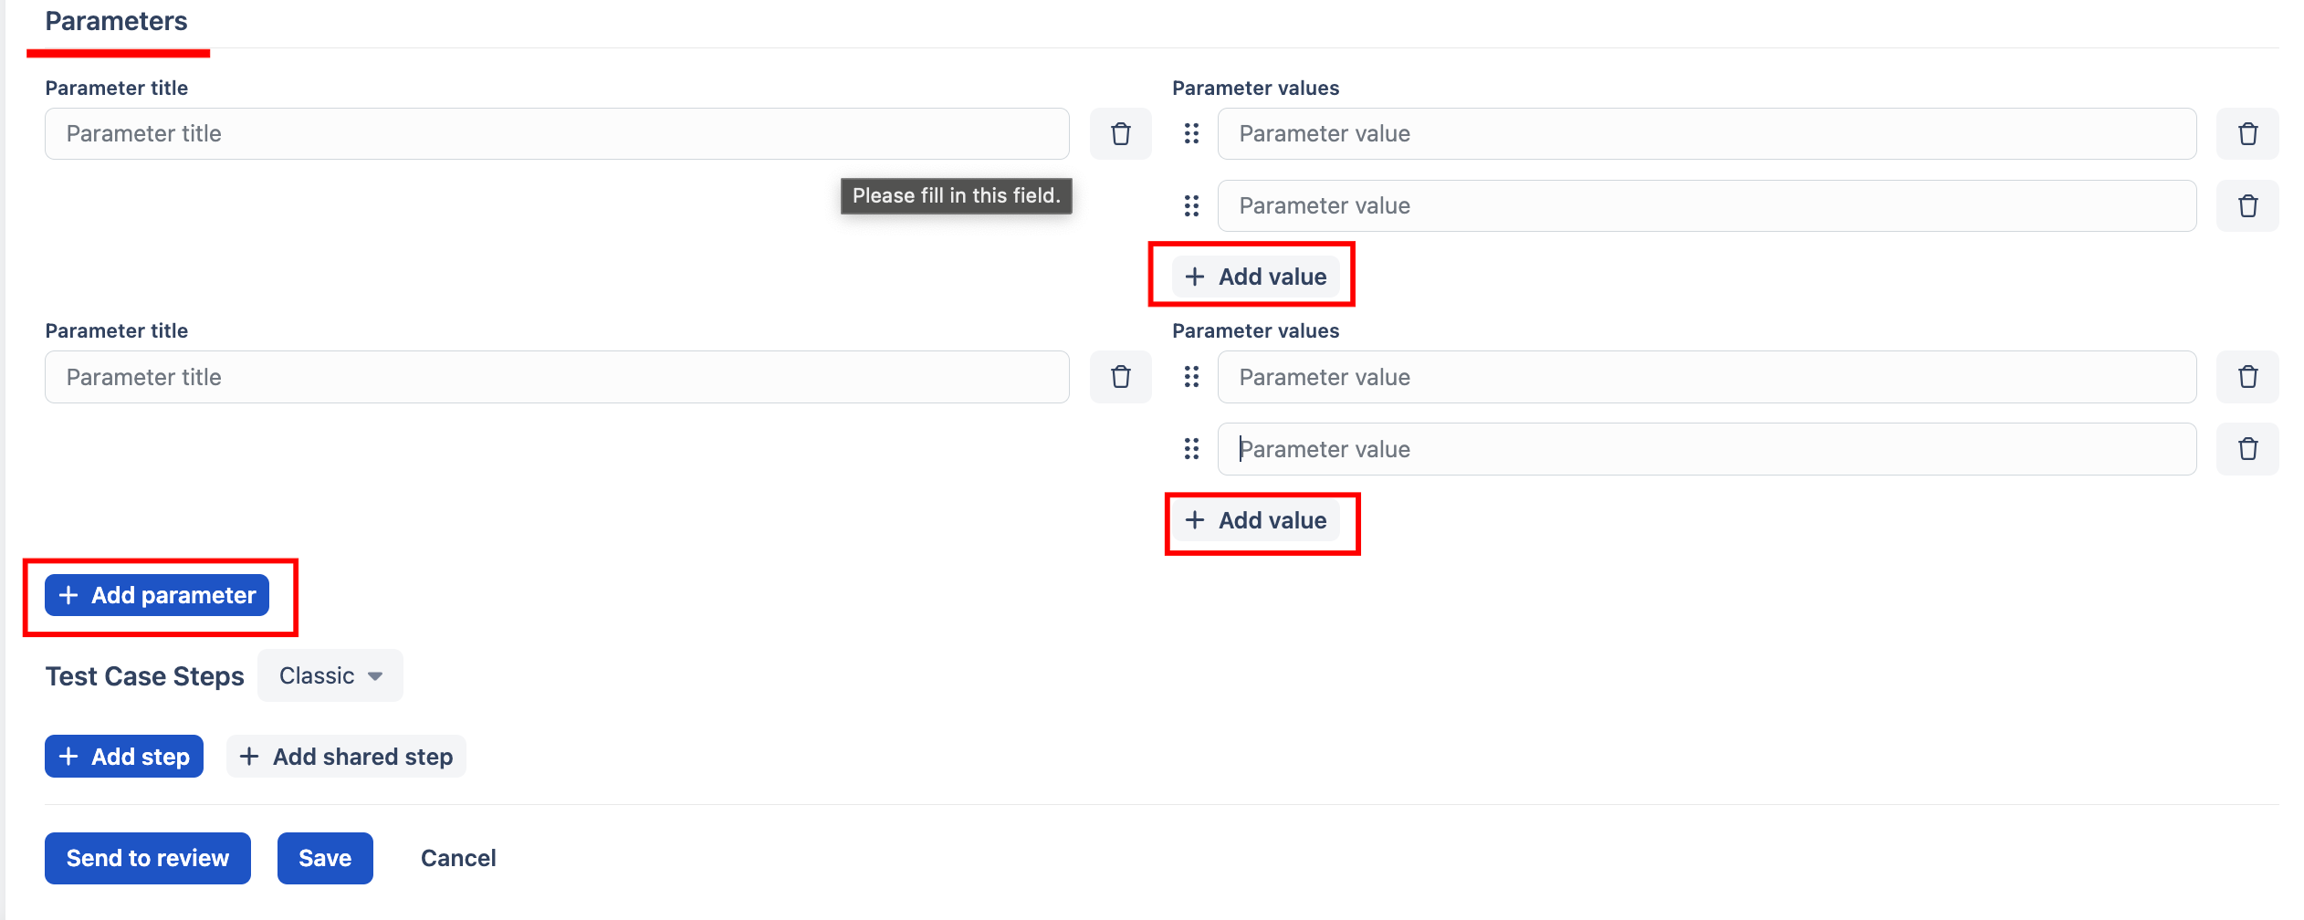
If you add a parametrized case to a test run, there will be several instances of it in the run, each representing a specific parameter value.

  • Test case steps: This section outlines the actions required to perform a test case and the expected results for each step. For instance, if I want to test a software module that provides GPS for connectivity, I'll need to explain which action needs to be performed and what the expected outcome is. You can choose between two types of steps: Classic or Gherkin. Each test case can have multiple steps that must be completed. To add a new step, click the "+ Add Step" button at the bottom.

Attachments: Upload images, screenshots, video snippets, or other documents to your test case to make it clearer or give more context. You can't attach a single file that's larger than 32MB.