Qase Docs
Help CenterAPI DocsRoadmapSign up for free
  • General
    • Qase docs
    • Get started with the Qase platform
      • Account settings
      • Projects
      • Test suites
      • Test cases
        • Test Case Parameters
        • Test case review
        • Shared steps
        • Import test cases
        • Export test cases
        • Trash bin
        • Muted Tests
        • System fields
        • Nested steps
        • Test case actions
        • Filters
      • Requirements Traceability Report
      • AI Test Case Generator
    • Execute testing
      • Test plan
      • Test runs
      • Configurations
      • Environments
    • Issues tracking
      • Defects
      • Milestones
      • Requirements
    • Analytics
      • Dashboards
      • Queries (QQL, Qase Query Language)
      • Saved queries
    • Webhooks
      • Test Case
      • Test suite
      • Test plan
      • Shared step
      • Milestone
      • Custom field
      • Test run
      • Defect
      • Test review
  • AIDEN
    • AIDEN - QA Architect
  • Guide: Action editor
  • Administration
    • Workspace management
      • Users
      • Invites
      • Groups
      • Roles
      • Fields
      • Custom fields
      • Notifications
      • Tags
      • Attachments
      • Audit logs
      • Hotkeys
    • SSO / SAML instructions
      • AzureAD
      • OneLogin
      • Google Workspace
      • Okta
      • JumpCloud
    • SCIM
      • User lifecycle management with SCIM
      • Enable SCIM
      • Users
      • Discovery features
      • Errors
    • Security
      • SOC 2 Type II / SOC 3
      • ISO/IEC 27001:2022
      • Penetration testing report
      • Subprocessors
      • Qase IP addresses
    • Billing
      • Billing options
    • Subscriptions
      • Free plan
      • Startup plan
      • Business plan
      • Enterprise plan
  • Apps
    • Issue tracking
      • Jira Cloud
      • Jira Server/Datacenter Plugin installation
      • GitHub
      • Asana
      • Linear
      • Monday
      • ClickUp
      • Trello
      • Azure DevOps
      • GitLab
      • YouTrack
      • Redmine
    • CI/CD
      • Jenkins
      • BitBucket
      • GitHub CI
      • GitLab CI
    • Chats
      • Slack
  • Automation
    • Qase API
    • Reporters
      • JavaScript
        • Playwright
        • Cypress
        • Mocha
        • Newman
        • Jest
        • WebDriverIO
        • CucumberJS
        • TestCafe
      • Python
        • Pytest
        • Robot Framework
        • Behave
        • Tavern
      • Java
        • TestNG
        • JUnit 4
        • JUnit 5
        • Cucumber 3 (jvm)
        • Cucumber 4 (jvm)
        • Cucumber 5 (jvm)
        • Cucumber 6 (jvm)
        • Cucumber 7 (jvm)
      • PHP
        • PHPUnit
        • Codeception
      • Kotlin
        • Kaspresso
    • Qase CLI App
      • XCTest
Powered by GitBook
On this page
  • What is BitBucket?
  • Why use BitBucket integration?
  • How to install BitBucket?
  • Usage
  • How to find the correct pipeline name in Bitbucket?
  1. Apps
  2. CI/CD

BitBucket

PreviousJenkinsNextGitHub CI

Last updated 4 months ago

What is BitBucket?

BitBucket is a Git-based source code repository hosting service owned by Atlassian. BitBucket offers both commercial plans and free accounts with an unlimited number of private repositories.

Why use BitBucket integration?

Qase integration for BitBucket allows you to start your automated runs directly from Qase, without the need to go to BitBucket to set them up separately.

How to install BitBucket?

  1. You need to install the from the Atlassian Marketplace.

  2. Click the “Get it now” button:

  1. Click the “Add” button:

  1. Click the “Grant Access” button.

  2. Refresh the page and click the “Manage” button.

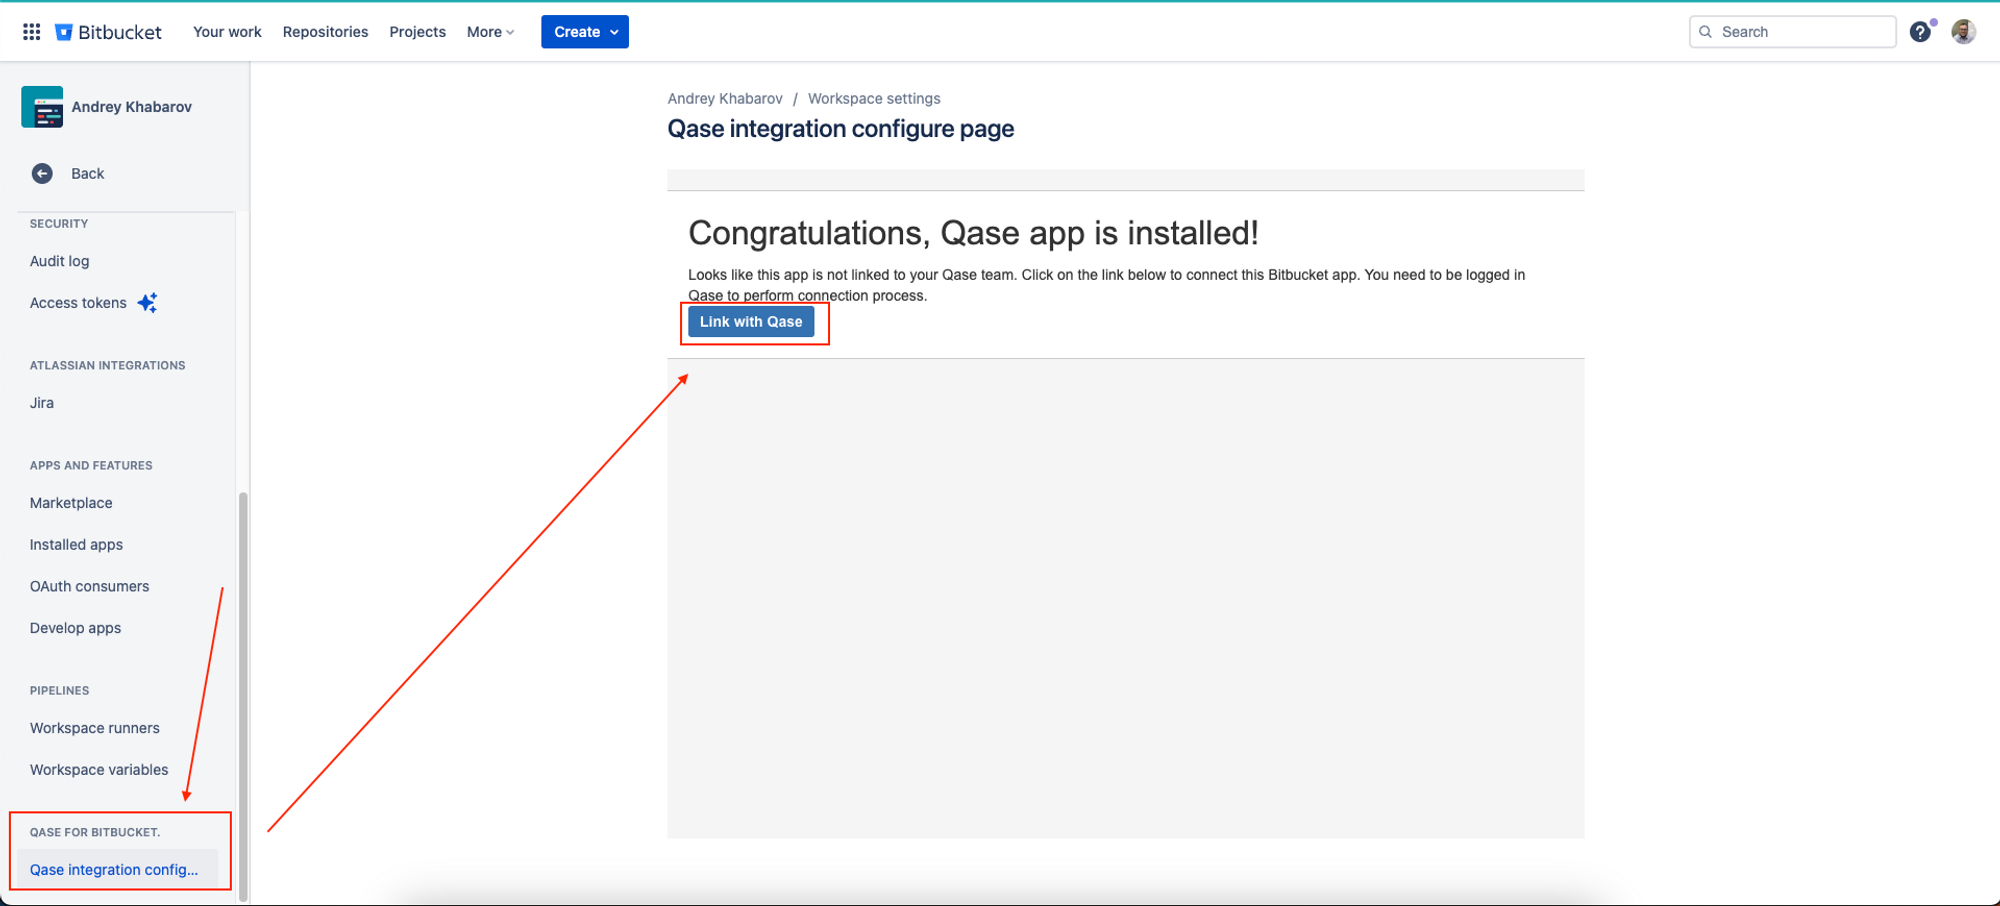
  3. Scroll down the right panel until you see “Qase for Bitbucket”. Click the “Qase integration config…” and after that, click on the “Link with Qase” button:
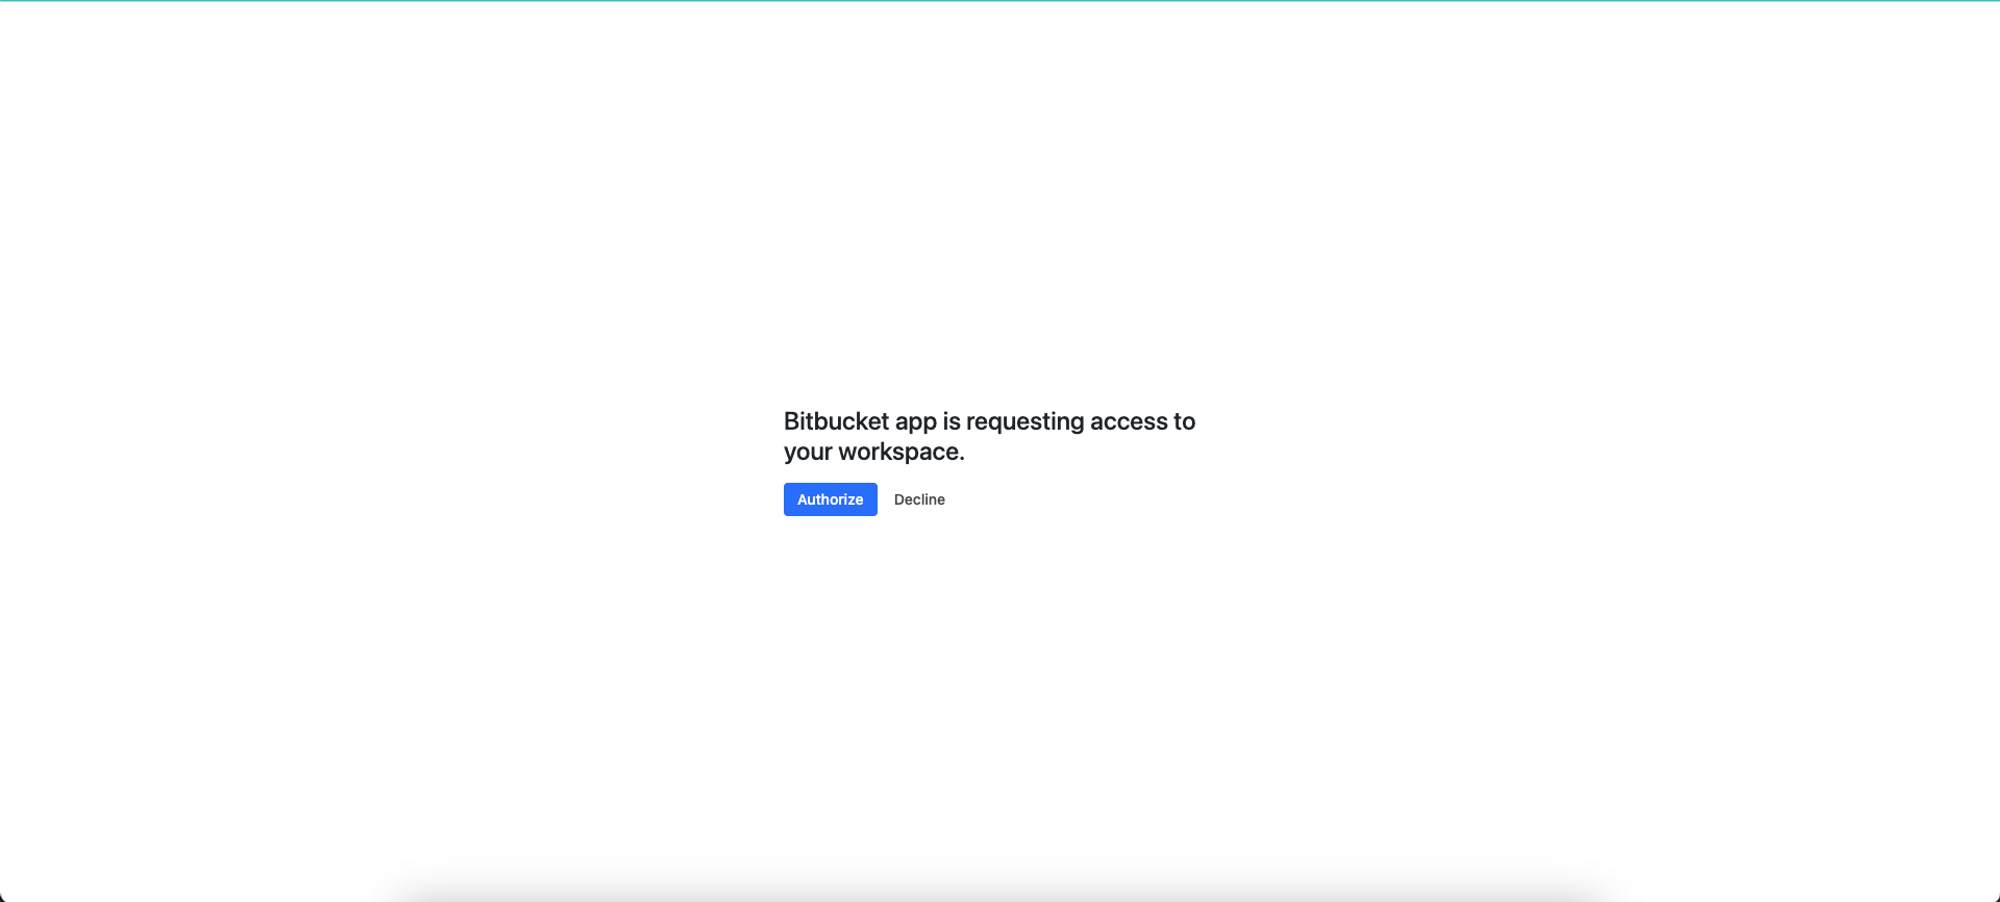
  4. You will be redirected to the Qase page. Click the “Authorize” button:
  5. Finally, you will be logged in automatically (or need to log in if you have an outdated session), and that's it.

  6. Go to Apps → Continuous Integration and take a look at the BitBucket app to be sure that integration was installed successfully.

Usage

  1. Start a new automated test run:

  1. Choose a CI/CD system to use (BitBucket):

  1. Fill in all necessary fields except the “Pipeline field”:

  1. Fill in the “Pipeline” field and click the “Start a run” button.

You must manually enter the Pipeline name from your Bitbucket.

You only need to do this once. Once added, this Pipeline will appear in the drop-down list and will be remembered in Qase. You can see the names of the Pipelines in your Bitbucket (Please check the instruction below to figure out how to do it)

  1. You will be redirected to a test run you started. In the test run details section, you will see a link to the workflow run in GitHub and the current status.

  1. When the tests have been executed, the rest run will contain all the results sent by a reporter (it should be properly configured):

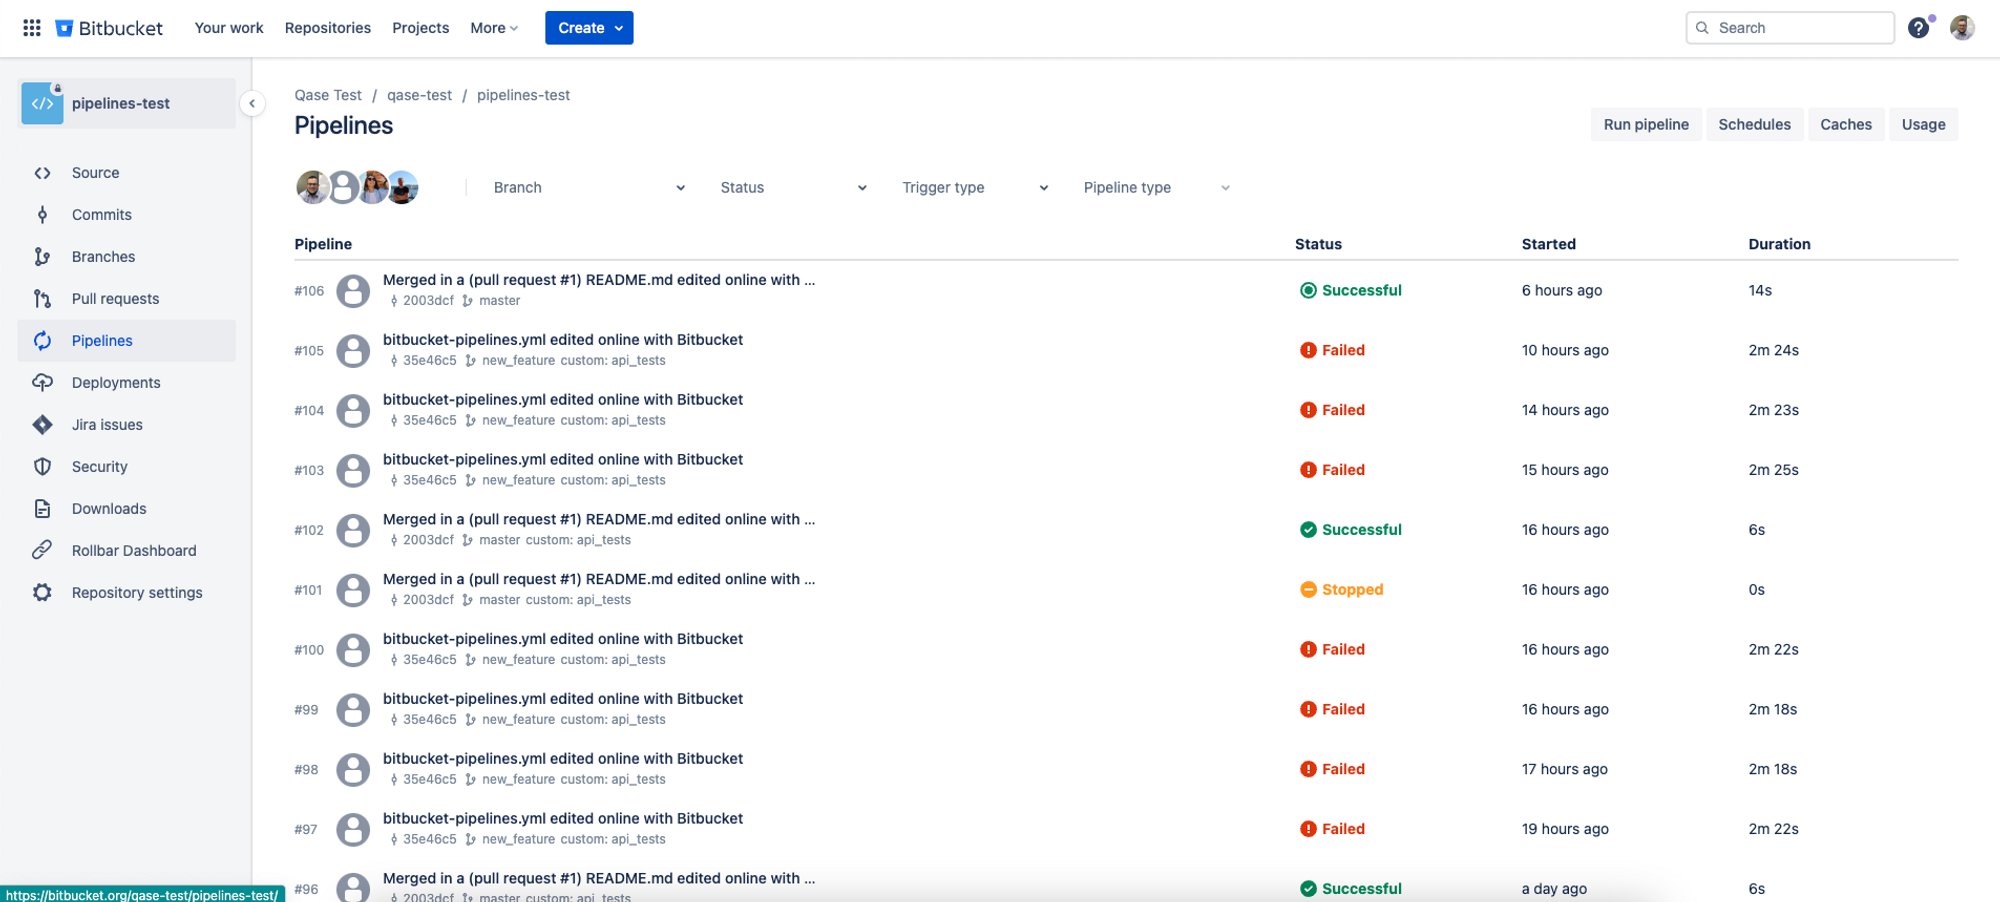
How to find the correct pipeline name in Bitbucket?

  1. Open your company Bitbucket.

  2. Open the repository.

  3. Click on the pipeline's section.

  4. Click on the Run pipeline button:

  5. In the modal window, choose the branch which you would like to start:
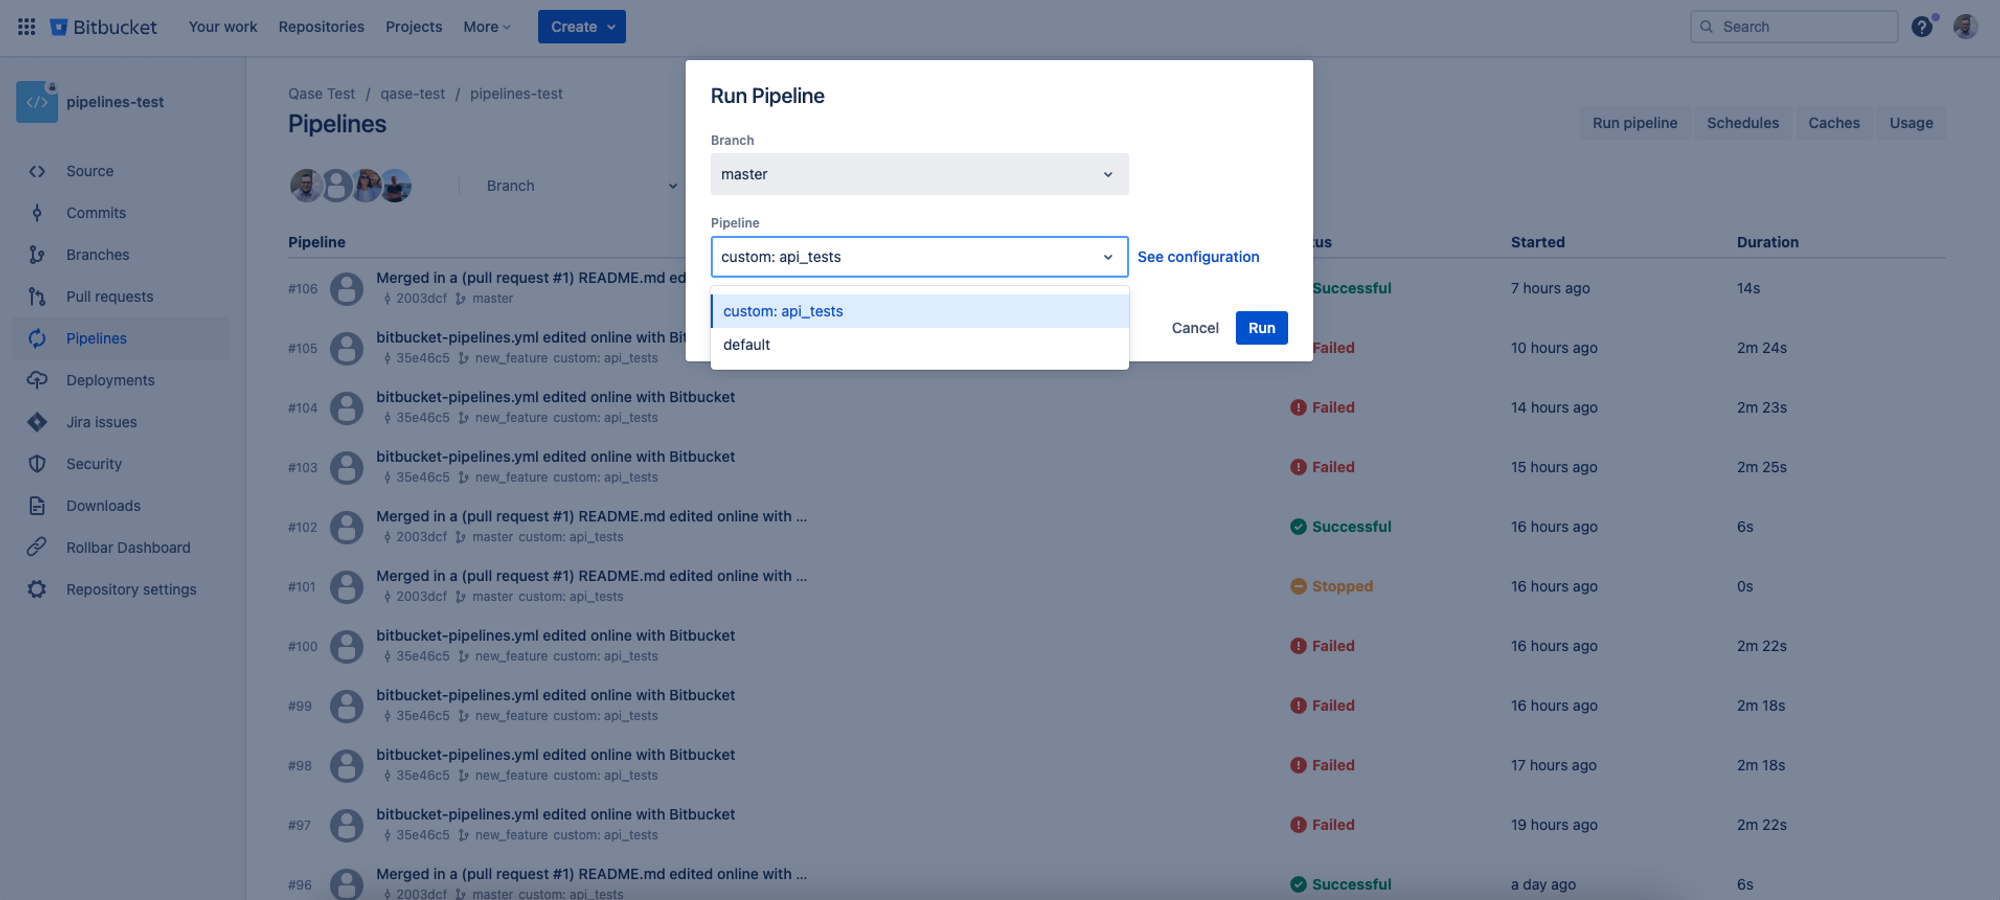
  6. Click on the select box with the name Pipeline and you will see a list of pipelines. So, let's assume that I would like to run the first one. In this case, the name of my pipeline is api_tests. If I want to start the second one - the name is default.

  7. After you figure out which pipeline name needs to be used, you need to add it in the last field on the "Create Automatic Run modal" (”Pipeline” field).

Qase Bitbucket app